By default, Microsoft’s OneDrive backs up your desktop, documents, and the Picture folders. You can also configure OneDrive to backup other Windows folders as well. Although OneDrive is helpful, if you have limited storage left on your Microsoft account, you might want to unlink OneDrive from Windows 10/11. Likewise, if you don’t want to auto-upload the files to the cloud storage service, you need to unlink your system from the OneDrive. Also read: How to Backup Windows Folders to OneDrive Automatically
Steps to Unlink OneDrive from Windows 10/11 PC
So, in this article, we have shared a step-by-step guide on how to unlink OneDrive from Windows 10/11 computer. Let’s check out. Necessary: We have used Windows 10 to demonstrate the process. The steps to unlink OneDrive from Windows 11 are also the same.
First of all, launch OneDrive on your Windows 10/11 computer.
Next, right-click on the OneDrive icon located on the taskbar.
From the list of options, click on Settings.
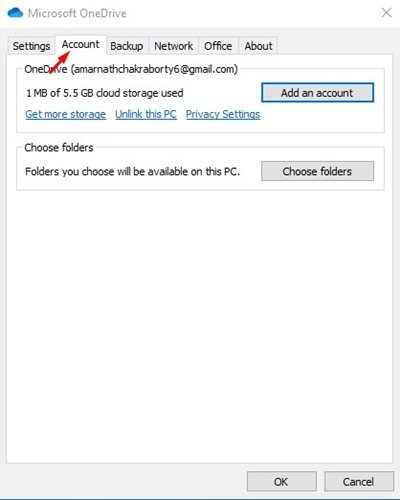
On the Microsoft OneDrive Settings page, click on the Account tab.
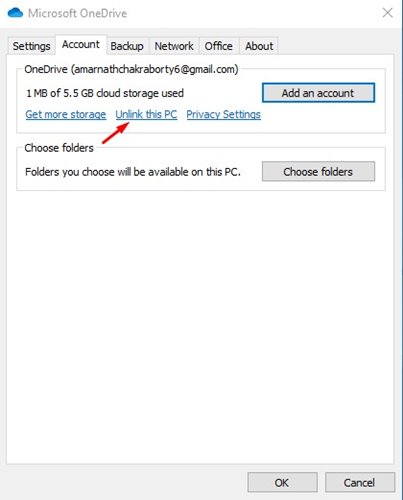
Under the Account tab, click on the Unlink this PC option.
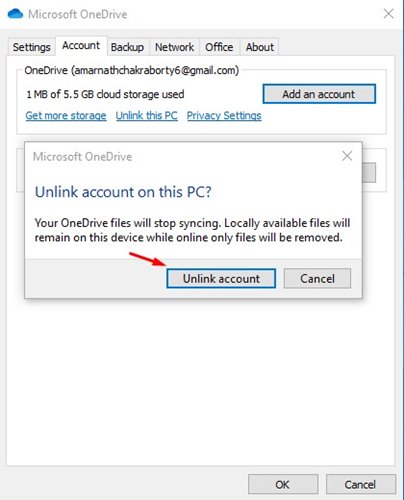
Now, on the confirmation pop-up, click on the Unlink account option.
That’s it! You are done. This is how you can unlink OneDrive from Windows 10/11 operating system. So, this guide is all about how to unlink OneDrive from Windows 10 computer. I hope this article helped you! Please share it with your friends also. If you have any doubts related to this, let us know in the comment box below.